Merry Meet everyone,
The time has finally arrived: my post about how I built my faery garden. The information was ready to go a few days ago, but we had some technical difficulties (old laptop plus router having a tantrum). Plus term has begun so I'm knee deep in paperwork. But the weekend brought a brief reprieve from the rain, so I grabbed the gardening tools and got to work on a project I've been desperate to do ever since we moved into a place with a garden (although faery gardens can be inside too!).
So the first step is having a vessel in which to put the miniature garden- the best thing to use is either a planter or a birdbath. I had a very clear idea in my head of what I wanted mine to look like, something that had a trunk and wasn't too deep. So it had to be a birdbath, although it took a lot of browsing- both online and in shops- to find The One. And especially one that my husband didn't deem too expensive.
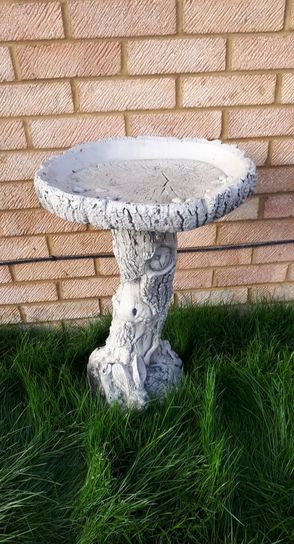 | We eventually found it in a great garden centre in a village just outside of where we live. I saw the tree-trunk carving with the owl and the bunny, pointed to it and said "that's it. That's my faery garden!" After Mr Shanti deemed it something within our price range, we lugged it into a trolley, paid and brought it home. Which turned out to be quite the challenge as this thing- while it splits into two parts- is solid stone and very heavy. And we don't have a gate directly into our garden so we also had to carry it through the house. Between his having zero strength and my dodgy lower back, we were both about ready to crack open a bottle of mead by the time we got this thing home! And then, the fun part! Let's build the garden! |
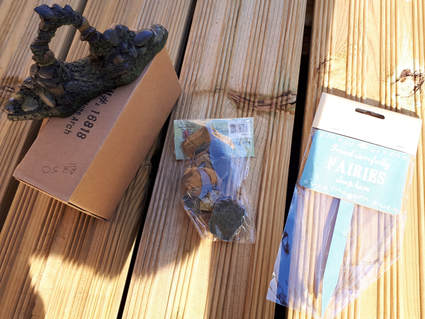
For the most part, faery gardens consist of some lovely plants, some sparkly stuff and adorable little accessories that a faery might use, such as a little bench, a stone path, perhaps even a house.
As luck would have it, there was a stall at the Artemis Gathering this year selling such treasures. And at a reduced price. I had to restrain myself to a few items otherwise I would have come home with all of it. I decided on a little entranceway, a stone path and a sign (all pictured)
As luck would have it, there was a stall at the Artemis Gathering this year selling such treasures. And at a reduced price. I had to restrain myself to a few items otherwise I would have come home with all of it. I decided on a little entranceway, a stone path and a sign (all pictured)
So I had my pretty little accessories, but faeries need plants too! I struggled with what to get- should I get flowers? Very pretty during spring and summer, but not so much during the winter when the flowers aren't in bloom. Also, I'm not very adept at gardening (yet) so who knows if they would actually flower again? My peace lily (may it rest in peace) never did.
I could do a miniature tree... but who knows how well a bonsai tree would fare outside in British weather? Also I feared that, as I am still pretty rubbish at gardening, it would be dead in a month. So no trees.
Then, on a grocery run, I came across a sweet little Heather plant which was perfect. It'll be green all year round, it kind of looked like a mini fir-tree and I can easily replant it when it gets too big for the bird bath. A nice lady who saw me admiring the Heather told me that they need lots of watering- I was very thankful for that tip!
With all my components together, it was time to start building the garden. Obviously, the first thing to do was put in some soil and my Heather plant. Although I ran into my first roadblock when I fully realised just how shallow my pretty new birdbath was. No problem- throw in some more soil around the plant and we have ourselves a little faery hill!
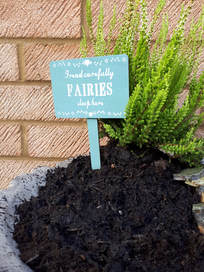
Of course, this had to be where the sign also went, because the faeries don't currently have a house. So they would surely dwell in the hill itself.
Next, I added the other parts. The slope of the hill was perfect for the stone path (which you can just see in the photo), which lead down to the entrance of the garden. Good job I also had the little gateway as well!
With all my basic parts in, it looked lovely but still a bit bare. But I had a plan!
Those of you who follow my Facebook page will know of my very exciting discovery that my neighbour's hazel tree overhangs into my garden. Which means I have a nice supply of hazelnuts. I grabbed a few of those and created a little border around my garden.
It still didn't quite feel like enough. I needed crystals!
In my teenage years especially, I was obsessed with crystal magic and healing grids. I still have a great love for them, although I don't buy them in the massive quantities that I used to (apparently being an adult means I have to pay bills and stuff... ugh!). So I do have a very impressive collection of tumblestones and quartz points. I wanted to aim to use larger crystals so I don't lose little tumblestones to magpies and such, so I dug into my box of spiritual tools. To be honest, the box had been sealed for a while as I needed to protect it during the extension-building and, since then, I've not really used my tools for rituals. So going back into the box was like a big family reunion (including a set of oracle stones that I made and completely forgot about!).
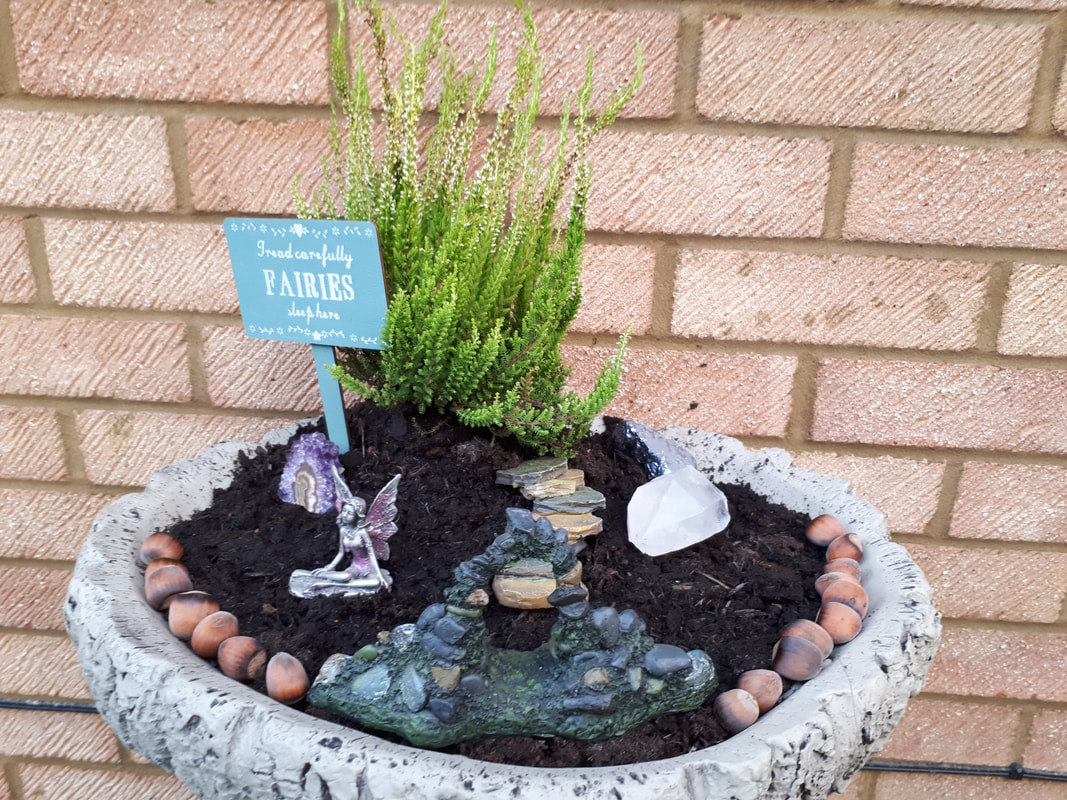
After a long time of skipping down memory lane (through the discovery of one of my old Books of Shadows), I finally found some crystals that I thought were suitable. I also found a lovely little faery statue that I bought years ago, so she's now in the garden too. I do worry that her paintwork might not last when it rains, but she's metal and will stay in shape when wet.
So, I present to you my finished product!
Obviously, it will always be a work in progress- I'm sure I will find more things to add and I imagine a bird or squirrel might help themselves to the hazelnuts. Plus the heather will eventually need a bigger pot and therefore a new plant will be needed.
But on the whole, I'm very pleased with how this has turned out!
I do hope I've inspired some of you to try something similar. Or, as the very least, given you an amusing read!
Blessings,
Shanti
xxxx
But on the whole, I'm very pleased with how this has turned out!
I do hope I've inspired some of you to try something similar. Or, as the very least, given you an amusing read!
Blessings,
Shanti
xxxx
 RSS Feed
